This is a kind of CRMised solution for my post Copy-paste to upload attachments automatically into CRM via USD.One should have USD in play to use that approach.
In this post, I would like to explain a solution which I have created to easily upload the files into CRM. Here is a quick glimpse of how its gonna work? Click on the video below.
Want to have a quick play with it and see how it is? Here is the access to my trail CRM version (Valid till Feb’17).
Url: MySetupOrg-Contact
User ID:bloguser@mysetuporg.onmicrosoft.com; Password: Blog@User
Now that you got the understanding on what we are trying to do here, Let’s see the steps involved.
Step 1: Download the Solution and import the solution
The CRM Solution (V 8.2) : Unmanaged || Managed
Above are the links for the CRM Solution, download your choice of managed or unmanaged solution and Import it into CRM. The solution on its own is very small with only 4 web resources (3 javascript files and a HTML file). Just FYI, I haven’t used any kind of 3rd party libraries (like Knockout/Angular/Some other) for this just to make sure the solution is small. Importing Solution into CRM is straight forward and you can follow the steps mentioned here in case if you are new. (Let me know if you are facing any problem in importing the solution).
Step 2: Add HTML Web resource to the <> form.
If you are familiar with CRM Customizations, Jump on to Step e directly from here. There are some key points to take in that step.
a) Create a new solution (although you can do the customization changes in default organization, but it is highly recommended to go for a new Solution) by navigating into Settings>>Solutions>>New Solution
b)Create the solution with required details for Name, Publisher etc. Here is the sample screen fyr.

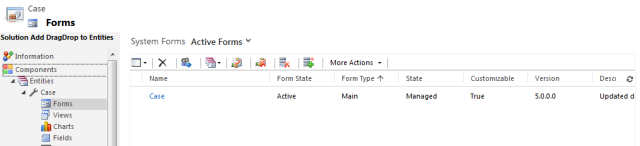
c)Add the required entity forms to the solution. For the sake of demonstration purpose, I’m adding Case entity for this solution. Note that, You don’t need to add any dependencies, Only the form on which you want to add the web resource is good enough.
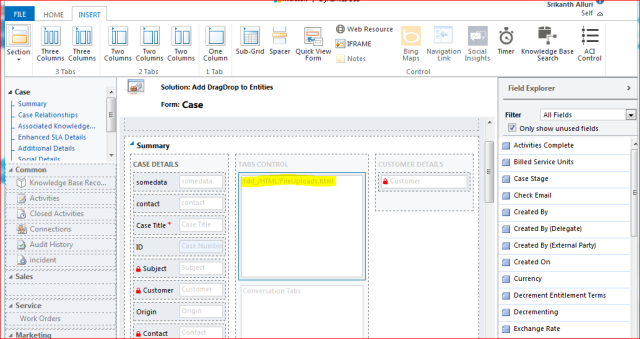
d)Open the form designer for the form and click on the Insert Web resource Tab in the ribbon.
e) In the new Web resource dialog box, select the details as mentioned below
| Tab | Property Name | Value | Remarks |
| General | Web resource* | fdd_/HTML/FileUploads.html | This will only come if you import the solution mentioned in Step#1 successfully |
| General | Name | FileUploadControl | Any name you want |
| General | Label | File Upload into CRM | Any Label you want |
| General | Display label on Form | No | I don’t want to clutter the form with some label of no use, But it’s up to you. |
| General | Visible by Default | Yes | |
| General | Pass record object-type code and unique identifier as parameters. | Yes | This must be a Yes |
| Formatting | Layout | Two Column | Selected this because it would work for my Form. You can set it based on your form style/location |
| Formatting | Number of Rows | 5 | anything b/w 4 to 6 gives a decent look to the control |
| Formatting | Scrolling | As necessary | |
| Formatting | Display Border | No | I found it more cool w/o border. Up to you again |
Here is a quick preview screen :
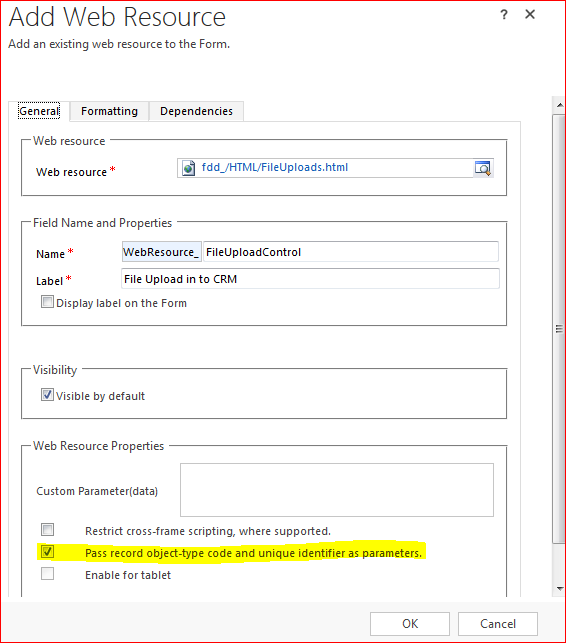
Note that Selecting the “Pass record object-type code and unique identifier as parameters” is a key selection. This gives the web resource the required record Id & Type to create notes.
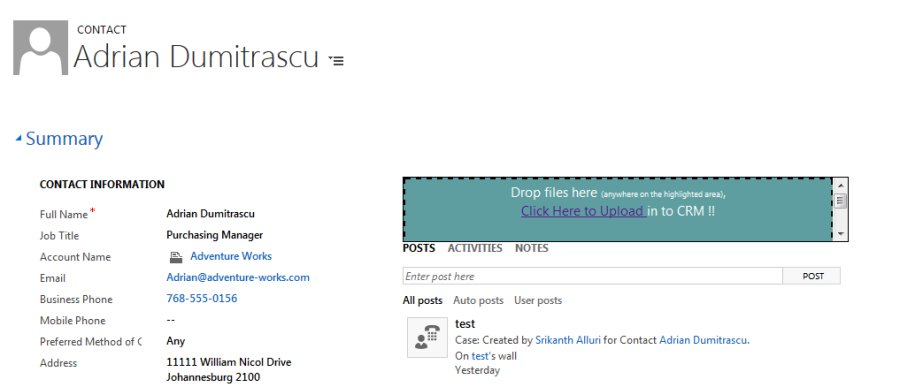
f) Save & Publish the changes; This is how the output looks like.
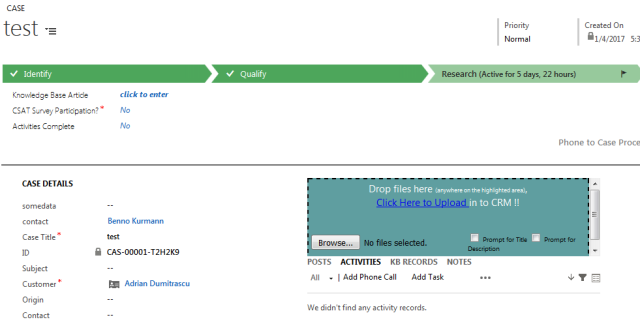
That’s it, You are all set. Just drag and drop a sample file to test it 🙂
Before wrapping up the post, Here are some of the important points that are not discussed so far in the post.
- Apart from Drag & Drop files into CRM, One can also use Browse button to select the files required. This is provided as a fallback scenario where users are working with some bad mouse or incompatible browser etc.
- Optionally, Users can select Prompt for the title, Prompt for the description before clicking on the Upload link. This will then prompt for the title & description to create notes (annotation record).
- For the sake of the blogging, I have selected Case. But you can use the web resource for any entity which is enabled for notes.
- I haven’t placed any file size restriction, but CRM has the 5MB limit. So you upload a big file, CRM will throw an error for you. My suggestion is not to drop too big file, which might hang the browser for some time as it will try to read the file first.
- The drag/drop functionality is based on HTML 5, So I would expect the users to be on new era browsers. (I don’t think this would be a big problem as CRM/Dyn365 on its own will not support old browsers).
- When the document is loaded, It will check for the record id. If it is not available, It will throw an error and stops attaching the required events. This would occur in 2 scenarios. a) You forgot to select the “Pass record object-type code and unique identifier as parameters” in web resource b)If it is a new record. In case of a new record, Users have to first save the record and then refresh it to start using.
- I haven’t used any fancy uploading images, as I want to keep it as simple as possible. Attached the source code also at the end of the post, Play with it and design as you like 🙂
- Not minified the javascript as I don’t found a major reduction in size. Thought leaving like that might help some enthusiastic developers to debug if required.
Here are all the links once again!!
Hope this helps in your projects, Feel free to contact me in case of any troubles !!

Srikanth – Jim here.
Can you do drag and drop files into USD?
LikeLike
LikeLike
Yes jim, i think we can try that with usd, but much more easy way than this is copy paste .. copy the requeired files using ctrl c, paste them anywhere in usd using ctrl+shift/alt+v… Check my other post on this.
LikeLike
Hi Ansrikanth,
I tried this in my test lab and every time I click to create new record it always pops with message “Unable to identify the entity type code/ID!! …” on form On-Load and you are forced to say OK for this message.
“I’ve this setting checked too “Pass record object-type code and unique identifier as parameters”.
I mean I understand we need to save it and then this drag drop works but this message every on load of new creation of record is spoiling the experience and we need to then say OK and then start entering data in fields etc
LikeLike
Hi Arpita
Yes, It is designed for existing records. You should be able to do slight modifications to the code and get it done for new records as well.
I’ll see if I can pull out any time today and modify the code for you.
-Srikanth
LikeLike
Thanks for the quick reply. I dig into the code and found where this is getting called.
function DocumentLoaded()
{
entityTypecode = GetQueryParameterByName(“type”);
recordId = GetQueryParameterByName(“id”);
if (entityTypecode == “” || entityTypecode == undefined || recordId == “” || recordId == undefined) {
alert(“Unable to identify the entity type code/Id !! You can’t use the Drag/Drop functionality now.”);
return;
}
recordId = recordId.replace(“{“,””).replace(“}”,””);
PopulateEntityInfo();
if (entityCollectionName == “” || entityCollectionName == undefined)
{
alert(“Some thing went wrong, Unable to identify the entity !! You can’t use the Drag/Drop functionality now.”);
return;
}
I commented the alert part and now it doesn’t appear every time when I create new records but the issue is now user will get confused that they can’t use it until they save it:)
So, I’m thinking for below logic to show this only after first save of the new record or for existing records and it shouldn’t appear at all when we click “create” . Do you think we can implement this quick
New logic to implement
——————————–
On create/onload of a entity record (set this function on load of the form)
Check If (formtype =create)
(
Hide (HTML webresource” fdd_/HTML/FileUploads.html”)
}
Else
{
Make it visible
}
LikeLike
Hmm, that should work as well.
LikeLike
Hi Ansrikanth,
Is it possible to have the listing of uploaded files with an option to selectively delete the file/s before upload.
LikeLike
Hi, yes it is possible. If you see my source code , when you drag drop files you will get an array of files. All you need to do is take tHis array and build UI to show and delete content from array. Should be doable with few functions..
LikeLike
Thanks! Ansrikanth, I have another query: once the file is attached into case it is not showing the attached files immediately in notes column. The attached files are visible after refreshing the case page. Is there any workaround to show attached files immediately in notes column.
LikeLike
Great solution!
Only question: It seems it is not working with .MSG (email) files. Any idea why?
LikeLike
Pingback: Drag/Drop files into CRM to create Attachments. | CRM Ramblings – Thinking Enterprise Solutions
Hi Srikanth,
Totally awesome solution! It has saved me loads of time. I have tweaked it where it will create the contact (if it doesn’t exist already) as well as the note.
In the 204 response I am trying to do a time out to allow a workflow to complete as below –
if (this.status === 204) {
var uri = this.getResponseHeader(“OData-EntityId”);
var regExp = /\(([^)]+)\)/;
var matches = regExp.exec(uri);
var newEntityId = matches[1];
//parent.Xrm.Utility.closeProgressIndicator();
//if (filesCount == 1)
//{
alert(newEntityId);
alert(filesCount);
setTimeout(function (){ alert(“Hello”); }, 30000);
var windowOptions = {
openInNewWindow: false
};
parent.Xrm.Utility.openEntityForm(“contact”,newEntityId,null,windowOptions);
//}
//parent.Xrm.Utility.closeProgressIndicator();
}
I do not get the Hello alert at all, only in debug mode. I’m presuming it is something to do with the function being asyc. Any ideas how to get round this?
Cheers,
Cameron.
LikeLike
I downloaded the source code from github, I wanted to make a few changes, but I don’t know how to create a package to import into crm. Someone can help me?
LikeLike
Hi ansrikanth,
i tied importing the solution in to 2015 crm its not working, could you please help me on this
LikeLike
What is the error you are getting?
LikeLike
Hello, i want to say it is great solution for CRM Online. Can you please advice it will work on V9 On premise?
LikeLike
It should, there isn’t any thing unsupported in this. However, would suggest to look at some pcf control for this, that would be the future anyways
LikeLike