This is the continuation to my previous post where I have explained how we will install the Visual studio templates for USD, Configuring the control and do a quick test on how the control looks in USD.
In this post, I will try to explain how we can get and set the data from Replacement parameters and fire events from control so that USD Administrators can configure actions against to it.
If you haven’t read the part-1 of this post, I would highly recommend you to quickly go through it once now to know the scenario what we are trying to achieve here.
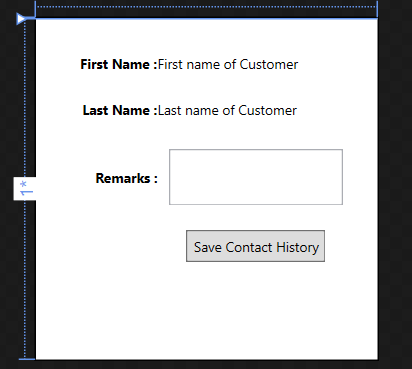
Let’s design the UI of the control that looks like

I know, it’s not the nice looking UI 🙂 but I’m fine with it for now as my main intention is not to describe UI rather it is the usage of Replacement parameters. If you are not familiar with XAML, for now you can simply Drag n Drop controls like how we used to do in traditional windows applications.
So what we will do is, When a particular Action is called on this Custom control then we will populate the First Name and Last name of the customer.
It is not mandatory to have a custom action just to populate the couple of fields on the form, but a)I want to show how replacement parameters works b)It is always a good practice to loosely couple the custom control & USD data.
If you are not familiar with traditional USD Actions & Action calls and passing parameters through action calls, I would suggest you to go through this and this. (It’s a bit sad that MS didn’t updated their documentation yet with Dynamics 365 screens. Henceforth you might be seeing at Old screen shots in these 2 links but you can still relate what & where it is in Dynamics 365).
- Navigate to USD Configurations in CRM, Settings >> Unified Service Desk >> Hosted Controls >> CustomControlDemo (which we have created in the previous post).
- Under Actions sub menu, Create a New Custom action with name “PopulateDetails”. You can leave all other fields with default values.
Now that we have the custom action ready on configuration, we have to override it and define it’s behavior in our code behind. Remember the DoAction overridden method we have discussed in previous post ? Let’s jump in to code behind and add the following code .
// Catching an action in the "DoAction" overriden method..
if (args.Action.ToLower() == "populatedetails")
{
// To get the First Name from the Context directly ..
var fname=Context["firstname"];
txtFirstName.Text = fname;

//Getting data from the parameters passed in the Action Call..
//Considering only one parameter is passed..
var lname = args.Data;
txtLastName.Text = lname;
}
So, Firstly we have placed an If condition to make sure we are not intercepting any other action calls apart from “PopulateDetails”.
And then we took the First name from the HostedControl inherited property – Context. We can take any $context replacement parameters directly like this. But I don’t suggest to do it, rather I would leave it as a Data parameter that Administrators can pass from the action call.
Then the last name we are expecting to get from the Data parameter which will be available for us as part of EventArgs. It might be a bit confusing at this moment, but very soon when we create the action call for this I’m sure, you will get it clearly. Here is how the code looks like.

Note that, This is not really a production ready code. You should be doing proper validations and best practices etc. if you want to take it up in to your systems.
We have our code behind ready which can populate the FirstName & LastName fields. Build it once to ensure there are no errors and copy the dll & pdb files in to USD folder as explained in previous post.
The left out part is, Creating the action call which will actually calls the custom action of this custom control.
Creating Action Call:
- Navigate to CRM, Settings >> Unified Service Desk >> Action Calls
- Click New to create new action call and populate the following parameters.
Attribute Vaue Remarks Name Populate Customer Details on Custom Control Any name would work Order 10 Hosted Control CustomControlDemo Or whatever the control you created Action PopulateDetails Or whatever the custom action you created in previous step Data [[contact.lastname]+] This will provide the Last name value in the EventArgs’s Data property. The + symbol ensures to provide Empty value if one is not available - Save and Close the Action call.
- We have to trigger this action call on a specific event. One option is to trigger it every time when a NewSession started. Instead, I would prefer this to start once after the contact form loads. In this way, I can ensure that all my replacement parameters are populated.
- So, Navigate to Hosted Controls >> Contact >> Events >> BrowserDocumentComplete
- Add this action call in to the Active Actions grid which will ensure to call this action every time the Contact form loads.
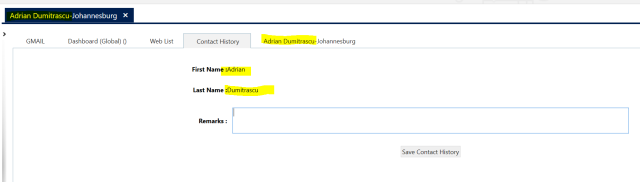
That’s it. We have the Custom Action ready, Overridden the custom action and provided some behavior to it and triggered the action call as well. If we did every thing correct then if we open the USD now we should be able to see the First Name & Last Name of Customer populated in the Contact History Tab of USD.
I will explain further in my next post on how do we wire-up events and raise events from custom control to USD, meanwhile I would suggest you to enhance this control further which makes the control more useful to business.
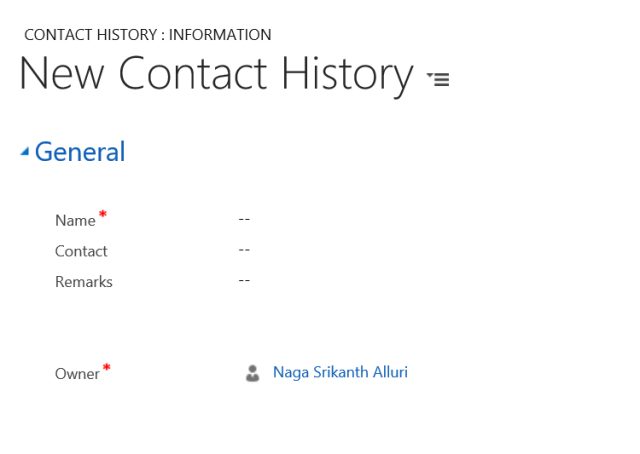
Also, Please go ahead and create a new Custom Entity as shown below which will hold the contact history records we are going to create in next post.
Hope this helps, Happy USDing !!

Pingback: Create Custom Hosted Control – Part 3 (Firing USD Events from C#) | CRM Ramblings
Hello,
Nice post thet’s really help me doing my graduation project but i have q question and i hope get an answer.
Like we passed the last name here from action i want to know if i can passed also the startTime of the session and the duration of the session !?
LikeLike