
One of the many recent features Microsoft announced is “C# code in custom connector”. In the past we used to build some sort of services (azure functions mainly) to host the code and configure it as custom connector. Although it is quite powerful but it is good amount of work in terms of acquiring azure services for some simple helper methods which are natively difficult in Power Automate.; not only that but one should be looking for a “pro” developer if we start talking about Azure. I remember writing a nasty flow, just to remove the special characters from a given string (Looping through all the characters in the string, conditions, replace, joins all sorts of stuff) which was supposed to be couple of lines of code in C#. I’m sure it won’t be an easy win with the IT procurement team to spin up a Dev, Test and Prod Azure resource groups for such a tiny azure function IMHO.
When I heard about this new feature where we can directly write C# code in the connector itself, I was very excited and today finally able to build this. Thought would be helpful to all others as well and so this post. Let’s go ahead..
- Create a solution in Dataverse, Click on New > Automation > Custom Connector (I’m assuming you already know what is a Dataverse Solution is and how to create one as we are talking about fairly advanced topic now).
- Give it a meaningful name. As I have started building this as a helper methods, I have named it as “Organization Helper”
- Give some meaningful description for the connector and any host name. The way it works is, the connector first reaches the host URL provided here, once it is success that is when the actual code executes and so, I would recommend it to keep a lightweight URL here like Google/Microsoft etc.

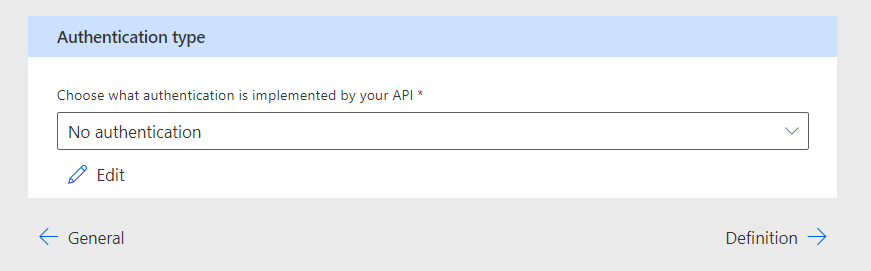
- Next click on Security, leave the Authentication Type to ‘No Authentication’ as we are making simple Helper methods which can be accessible for your entire organization with out any additional security (like how they can access any other common Flow actions).
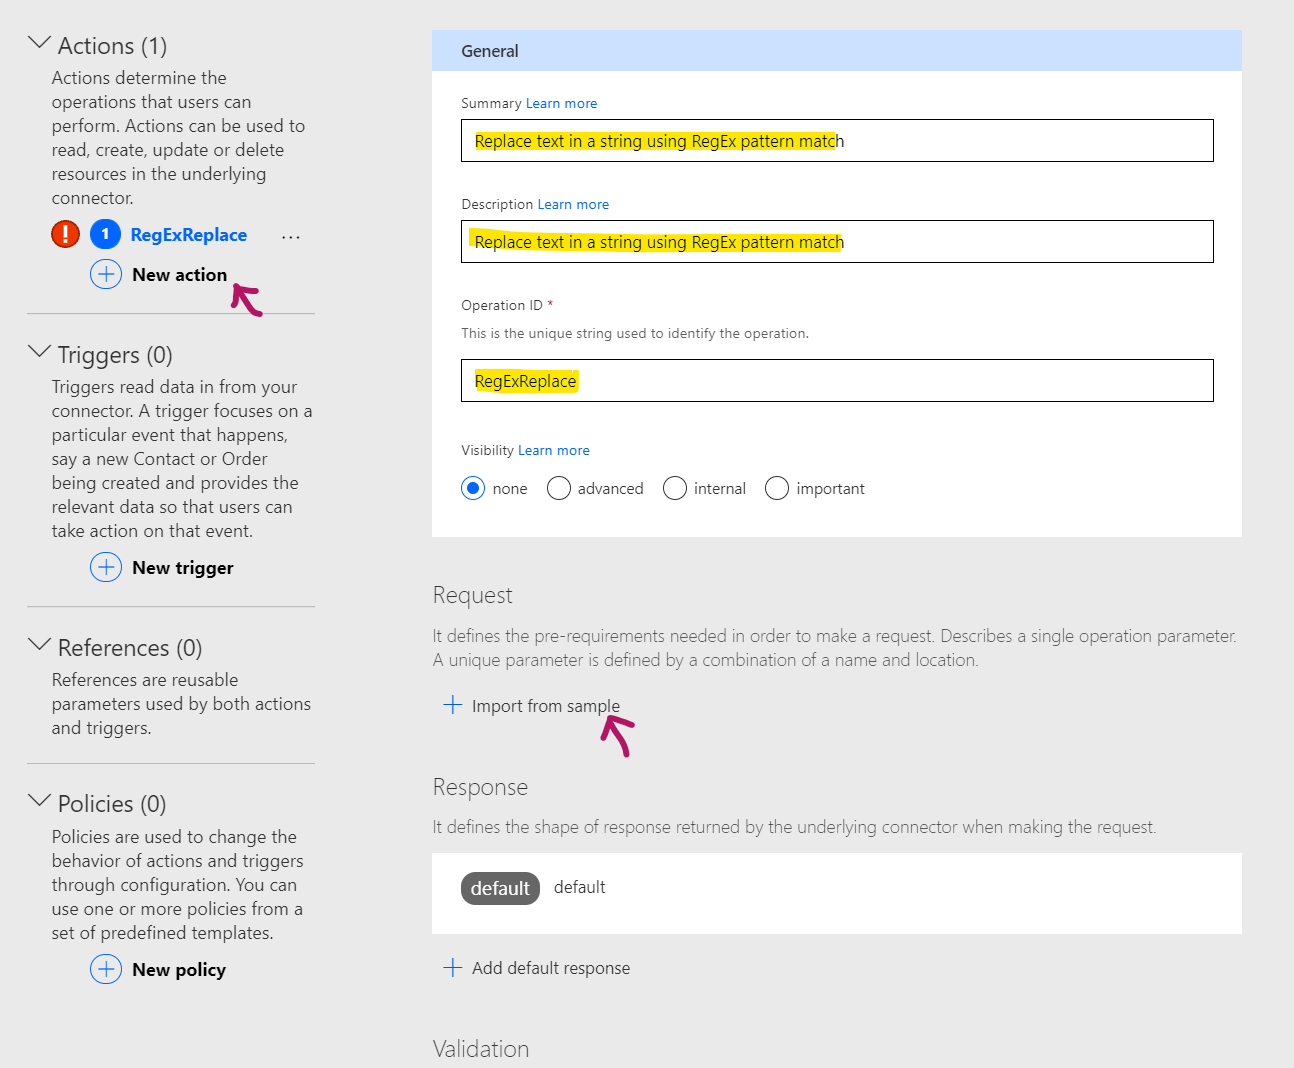
- Click on Definition, this is where we have to create what parameters are expected from the user and what response we should give.
- Click on New Action
- Provide a Summary and Operation Id. In my case the Operation id is RegExReplace
- For the request object, click on Import from Sample.
- In the Import from sample dialog, provide the details as follows
- Verb: Post
- URL: https://microsoft.com
- Body: {“Input Text”:”some text”,”Regex Pattern”:”Reg ex”,”Replace Text”:”some text”} (please note that this is a sample body on what are all the parameters expected from user. We are talking about 3 parameters here which will be displayed to user when they select the action.
- Click on Import

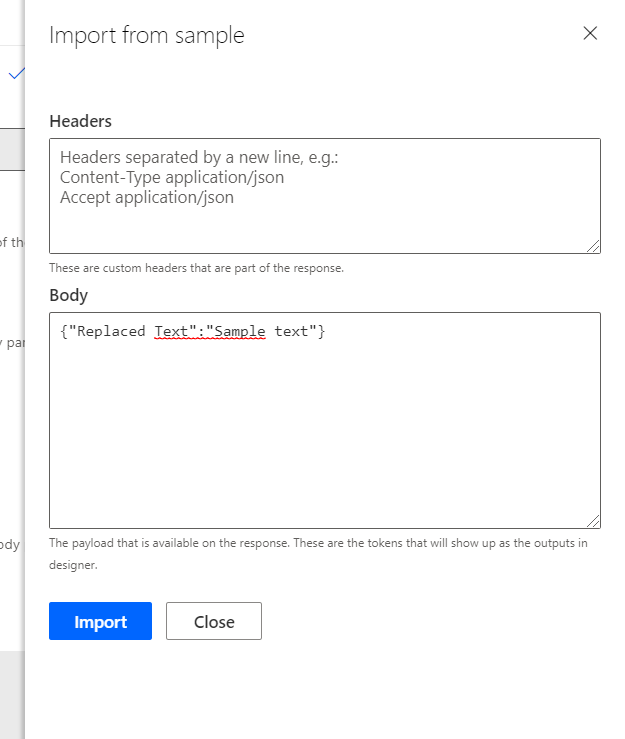
- Now that request details are ready, lets prepare Response body. We will be returning only one output for this action i.e. Replaced text. Click on the Add default response

- Provide response body as {“Replaced Text”:”Sample text”} as shown below and click Import.
- You should see a Validation Success as shown below, If not some thing went wrong somewhere. Check if the error message gives any clue. Click on >Code(Preview)¸this is where all the shining bits are 😊

- Select Code Enabled (it might take a min to enable it sometimes) and the Action name which you have chosen in the previous stage, in my case it is RegExReplace. Use the following code and replace it in the code window.
public class Script : ScriptBase
{
public override async Task<HttpResponseMessage> ExecuteAsync()
{
HttpResponseMessage response = new HttpResponseMessage(HttpStatusCode.OK);
var operation=this.Context.OperationId;
var contentAsString = await this.Context.Request.Content.ReadAsStringAsync().ConfigureAwait(false);

// Parse as JSON object
var contentAsJson = JObject.Parse(contentAsString);


// Get the value of text to check
var inputText = (string)contentAsJson["Input Text"];
var regexPattern = (string)contentAsJson["Regex Pattern"];
var replaceText = (string)contentAsJson["Replace Text"];

var replacedText=Regex.Replace(inputText,regexPattern,replaceText??string.Empty);
JObject output = new JObject
{
["Replaced Text"] = replacedText
};
response = new HttpResponseMessage(HttpStatusCode.OK);
response.Content = CreateJsonContent(output.ToString());
return response;
}
}
- Click on Create Connector Ribbon button.

- Your custom connector is ready, lets test it directly in the flow and see how it works. Create a new flow (manual/automated however you want to test)
- Click on Add Action, in the connectors list you should see your new custom connector as shown below.

- Select the connector (in my case it is Organization helper), it should display all the available actions (1 in this case)

- Select it and provide the required values, click on test.. hola 😃 . ..

This is like opening the doors for a huge opportunities, Some of the points to note though..
- It is still in preview mode
- I faced a problem with the deployment of the connector to next environments, end up being deploying it in to in its own solution.
- There are some limitations in the amount of code you can write and also on the namespaces you can use, please refer to Docs
I hope you liked the post and it helps..

Awesome! Thanks a lot for that post. Much better Than Loops, Arrays, Excel Integration or office scripts. Glad that I found you blog entry!
LikeLike