
One of the key problems/concerns we see after completing development of a USD implementation project is, how do we transfer the configuration data with out any hiccups to the next environment? This risk is a bit high if we are transferring configurations from Test to Live instance where it may not even possible to do a full round of testing.
I found many of my colleagues, “carefully” creating these configurations in the target environment manually; which is not only time consuming but also there is always a chance of doing mistake. Once we even tried to do importing using OOB Excel integration, even that also took lot of time for setting up the excel sheets (I remember, once we screwed up the environment as it tried to create duplicate records).
So, In this post we will see how we can use the Configuration Migration utility available in SDK to “safely” export the configurations from source env into target env. If you haven’t downloaded the latest SDK, I would highly recommend to download at here and check for the tool @ SDK\Tools\ConfigurationMigration location.
About the tool : One can use the tool for free to transfer any configuration data from one environment to another environment (including Production environment). However it is highly suggestible to take the backup of the data in the target environment which can help in case of any unexpected results.
There are 3 main steps involved in whole lift and shift the data.
- Create the data Schema file (One time step, the same schema file can be used every time).
- Export the data based on Schema
- Import the data based on Schema

A nice illustration of Steps involved in the process (taken from Microsoft website)
Fortunately, the whole process is GUI driven so we don’t need to remember any specific commands/key words 🙂
With out any further delay, lets go through the more detailed steps.
Generate Schema of USD Entities:
- Start the “DataMigrationUtility.exe” from the Configuration migration folder (SDK\Tools\ConfigurationMigration) and select the option “Create Schema”as shown below
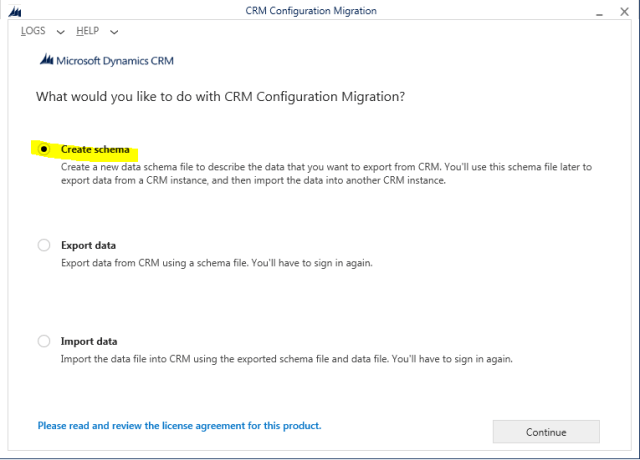
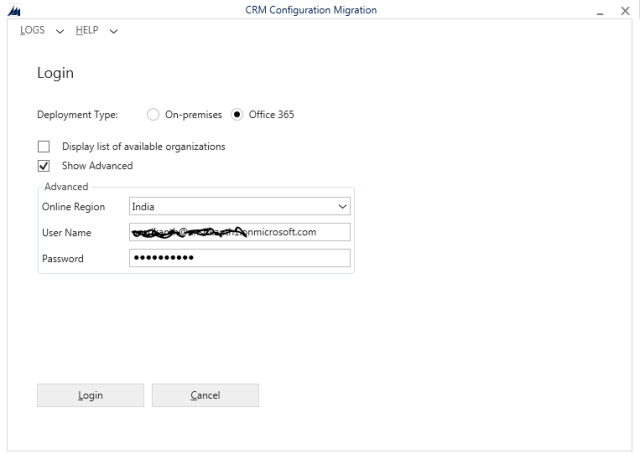
Create Schema for USD Entities - Click Continue and then login to your Source CRM Organization. (btw, it works for both OnPrem & Online env as well)
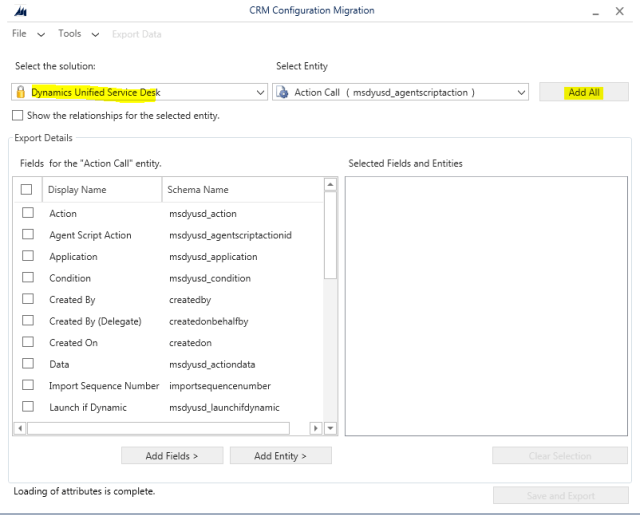
Login to Source CRM - After successful login, You should be able to see different solutions that are part of the selected organization. Select “Dynamics Unified Service Desk” solution and Click on “Add All” button to add all entities that are part of the solution. This step will include all the configuration entities whether you are having any records present or not in the entity.
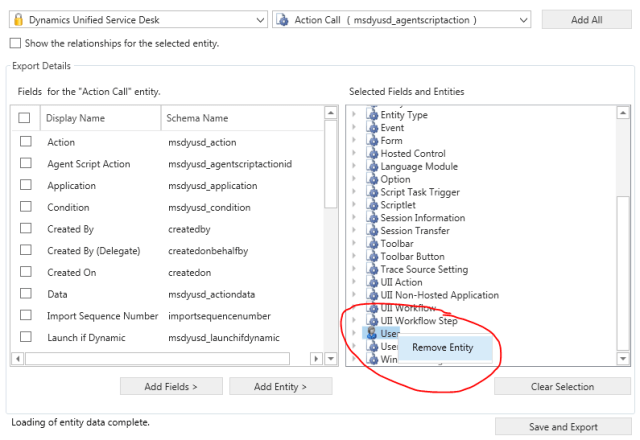
Add all entities that are part of USD solution. - Once after click on Add All entities, you should be able to see all the entities displayed on the second list box under heading “Selected Fields and Entities”. Notice that we have “User” entity also in this list which is not really required for us. (I don’t think one would be interested to import the users in to different environment like this). So, Just right click on the User entity and remove the user from List as shown. Also exclude “User Settings” entity as well.
-
Remove contact entity from the list - Now one of the important steps : Click on Tools Menu >> Configuration Import Settings
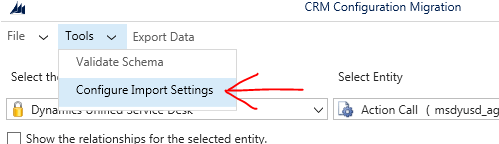
Configure Import Settings in the popup Select the check box “Disable Plugins on all entities for import”.
- Now from the available entities select “UII Action” entity, In the entity fields section select Name & Hosted Application and add them to Fields to Compare on Update section. Repeat the step for “Event” as well. Ideally we should provide the Uniqueness fields for all entities. For the entities for which there is no uniqueness provided then system will automatically consider the primary field of the entity for comparison which is “Name” in generally for all these entities. In my observation only “Action” & “Event” entities will have the duplicate names as they are Per entity and so I have asked to add Hosted application as well for uniqueness in both these entities
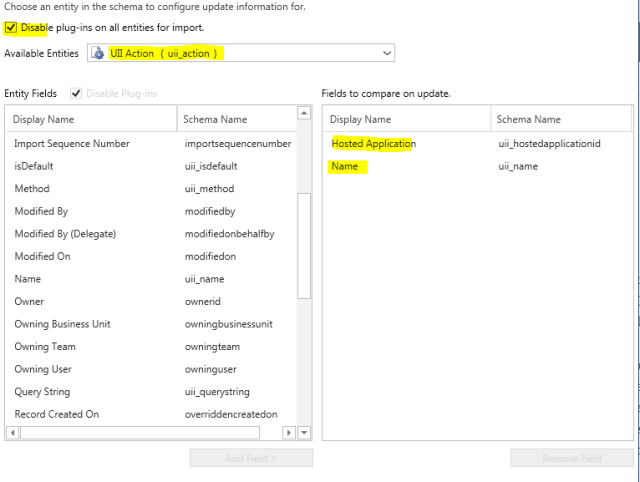
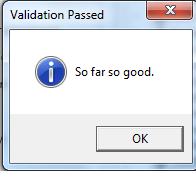
Disable Plugins & Create uniqueness for UII Action & Event entities. - Click on Tools >> Validate Schema once and you should be able to see this nice little “All good” message.
All good !! - Finally click on File Menu >> Save Schema menu item and provide the file path where you want to save the schema xml file. Make sure you are saving it in a safe location so that you can use the same whenever it is required. After successful save you should be able to see the message save success.

Schema generation completed.
Export Configuration data from Source environment:
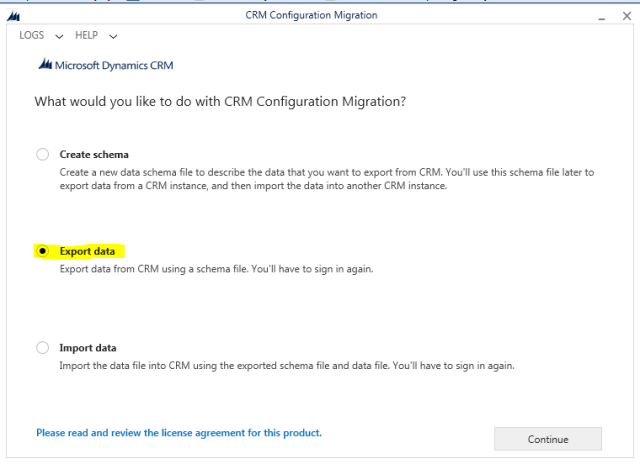
- Now that we have finished with schema generation, Close the window and select Export Data option from the main window, Click Continue and connect to the Source CRM Organization again.
Export Data - Select the Schema file create in before steps and provide a path for the data file (.zip) where you want to save the data. Click on Export Data.
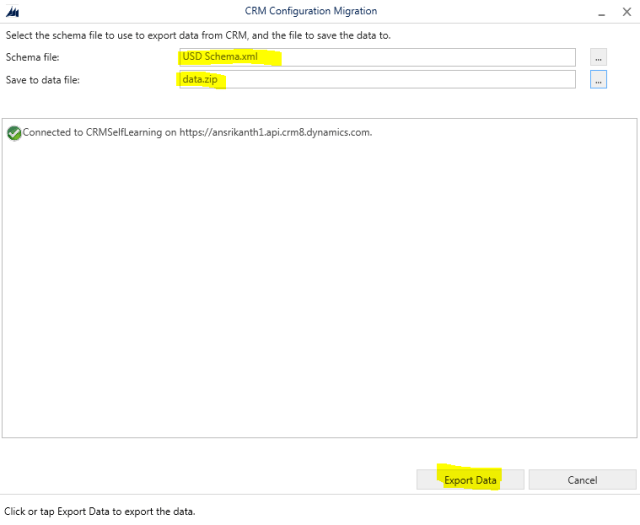
Export Data - The process might take bit of time based on the amount of data we are exporting. Once after finishing (you should be able to see the complete message as shown below) Exit from the process.

Data export successfully completed
Import Configurations into Target Environment:
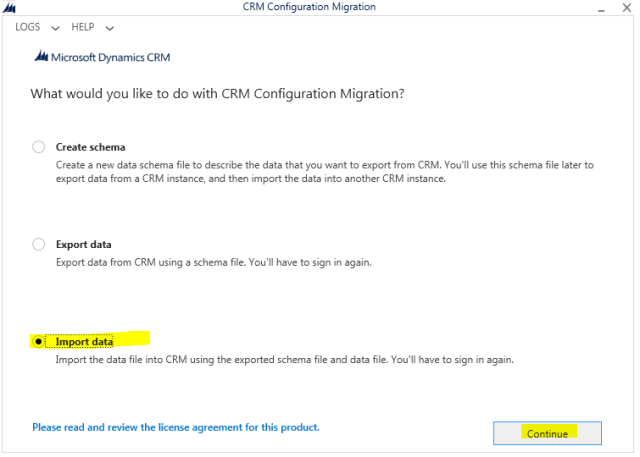
- Select the option to Import data and click on Continue button, Login in to the Target environment (the new organization where you want the configurations to be).
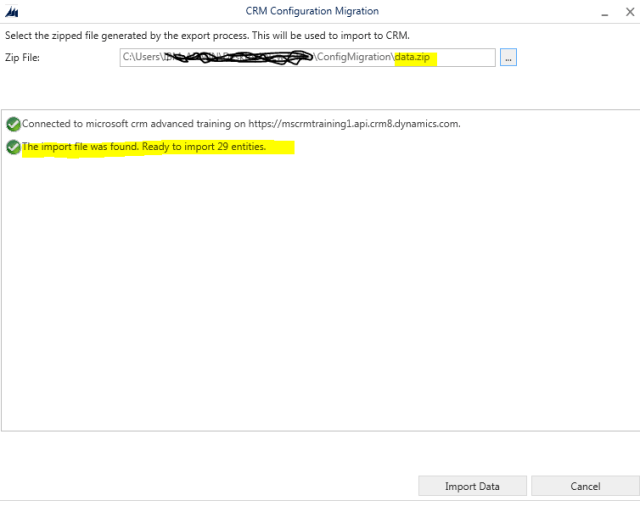
Import data - Select the data zip file that is exported as part of the previous steps, Automatically system should identify the number of entities that are ready to import as shown below.
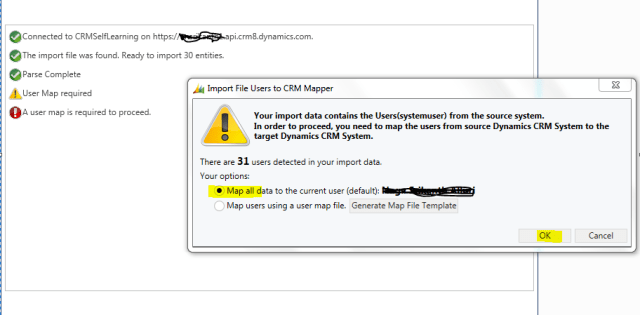
Importing data - You may see the user mapping clashes, If so accept to select the logged in user/current user.
User mapping - It might take bit of time to import, but once after successful import you should see the message and can check the log file as well for detailed information.

Import Successfully completed - That’s it, we are done with the import process. Cross check once the configuration by opening the USD.
Next time on wards whenever you want to export & import data, you just need to perform the Export data and Import data steps using the Schema XML file we already created (No need to regenerate the schema file). This way we can effectively use the tool to ensure quality of configurations migration.However it is worth to note some of the points as a last step.
- When you import from dev to test or test to live environments, make sure if you have to alter any URLs/user details etc which varies based on environment. For ex: for a particular LOB application the navigation URL for Dev can be totally different for the URL in Live. So you need to reconfigure these kind of configurations after the import.
- You can’t filter the data while exporting, this means every time you are going to do a full import from source to target which raises unnecessary risk.
- Make sure you are taking the back of data from Target environment before importing data.
I hope you have enjoyed the post and start exploring the tool. Please feel free to let me know your thoughts on the tool via comments.

Pingback: Deploying Microsoft CRM USD - Validate and Verify - Celedon Partners
This blog post provides a helpful solution to migrating USD configurations.
LikeLike